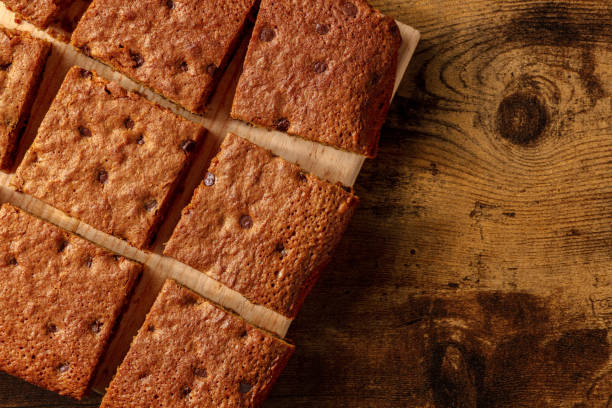
Brown Butter Miso Mochi Blondies
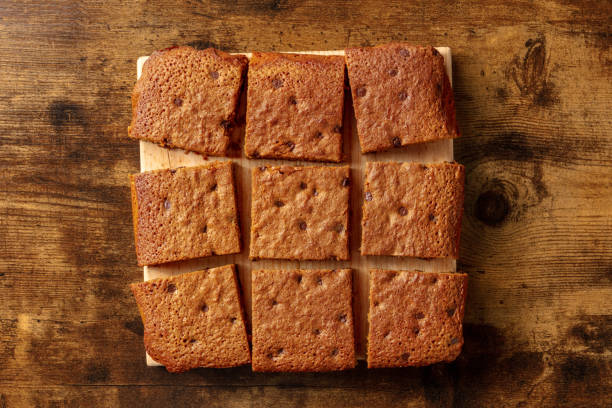
If you love the tension of textures and the thrill of surprising flavors, these Brown Butter Miso Mochi Blondies are made for you. They combine: a caramelized, nutty backbone from brown butter; a subtle savory lift from white miso; and a uniquely chewy, almost bouncy crumb thanks to mochiko (sweet rice flour). The result is a blondie that cuts cleanly yet yields with a satisfying chew, topped with a shiny crackled surface and pockets of molten chocolate or toasted nuts. These blondies walk a delightful line between classical American baking and Japanese pantry magic.
This article is an exploration, a recipe, and a troubleshooting manual all in one — written to help home bakers make a tray of blondies they’ll want to bake again and again. Expect a deep dive into techniques (how to brown butter correctly), the science of mochi in baked goods, adaptation ideas (including vegan and gluten-free swaps), and photo-worthy finishing touches.
Why this combination works
At first glance, brown butter, miso, and mochi might seem like disparate ingredients. But they actually create a beautifully balanced package:
Brown butter (beurre noisette) brings warm, toasty notes of caramel, hazelnut, and toffee. Browning milk solids concentrates flavors that amplify sweet baked goods without extra sugar.
White miso adds a gentle umami and saltiness that rounds flavors and intensifies sweetness. Unlike soy sauce, miso is thicker and mellower; white miso (shiro miso) is subtly sweet and works well in desserts.
Mochiko (sweet rice flour) gives a unique chew and elasticity that traditional wheat flour cannot replicate. It’s responsible for the mochi-like texture that keeps these blondies tender yet toothsome.
Together they produce contrast: caramel and umami, soft and chewy, sweet and savory. The brown butter gives richness, miso sharpens flavors, and mochiko creates texture. If you’ve ever wanted a blondie that bites back with chew and lingers with complex savory notes, this is it.
Who this recipe is for
This recipe is perfect for:
Bakers who enjoy experimenting with fusion flavors.
People who want a chewy blondie with a sophisticated flavor profile.
Anyone who loves sweets with a savory twist (think salted caramel, but deeper).
Home cooks who want to use pantry staples differently.
If you are gluten-free, you can make the recipe entirely gluten-free (see substitutions below). If you are vegan, there are useful adaptations later in this post.
A note about mochiko (sweet rice flour)
Mochiko is a glutinous (sweet) rice flour that’s widely used in Japanese desserts. It’s made from short-grain glutinous rice (not wheat) and is naturally gluten-free. When used in baking, it offers a remarkably chewy texture — the springy, slightly sticky bite associated with mochi.
Important distinctions:
Mochiko vs. rice flour: Mochiko is glutinous rice flour and gives chewiness. Regular rice flour (from non-glutinous rice) produces a crumbly, sometimes sandy texture.
Mochiko vs. cornstarch: Cornstarch is a starch, not a flour; it’s best for thickening and does not provide chew.
When you bake with mochiko, you’ll notice more elasticity and a moist crumb. That’s the desired effect in this blondie.
Ingredients (for a 9×13-inch pan)
This ingredient list is written for clarity and accuracy. Measure with a kitchen scale if you can — baking precision matters, especially when working with rice flour.
12 tablespoons (170 g) unsalted butter
1 1/2 cups (300 g) packed light brown sugar
2 large eggs (room temperature)
1 teaspoon pure vanilla extract
2 tablespoons white miso (shiro miso) — packed
1 cup (140 g) mochiko (sweet rice flour)
1/2 cup (65 g) all-purpose flour (optional: substitute with gluten-free 1:1 blend for fully gluten-free)
1/2 teaspoon baking powder
1/2 teaspoon fine sea salt (reduce if your miso is very salty)
1/2 cup (90–120 g) chocolate chips or chunks (dark, milk, or a mix) — optional but recommended
1/2 cup chopped toasted pecans or walnuts (optional)
Flaky sea salt for finishing (optional)
Notes on amounts and variations
For a gluten-free batch: swap the 1/2 cup all-purpose flour for 1/2 cup additional mochiko or 1/2 cup tapioca starch + 1/2 cup rice flour — but note texture will vary. Using a labeled gluten-free 1:1 blend with xanthan gum often gives the most familiar blondie structure.
For a richer, fudgier blondie: use 10 tablespoons butter and increase mochiko by 2–3 tablespoons.
For more chew: increase mochiko by 2–3 tablespoons and slightly reduce AP flour.
Equipment
9×13-inch baking pan (or 8×8-inch for thicker blondies; adjust baking time)
Medium saucepan (for browning butter)
Heatproof bowl
Whisk and rubber spatula
Measuring cups and spoons or kitchen scale
Instant-read thermometer (optional but handy; brown butter occurs near 250–300°F in the pan, but rely on sight and smell)
Parchment paper for lining the pan
Step-by-step method
1. Brown the butter
Browning the butter is simple but needs attention.
Place butter in a light-colored stainless steel or copper saucepan over medium heat. A light pan helps you see when the milk solids color.
Melt the butter, stirring or swirling the pan occasionally. The butter will foam and then the foam subsides. Watch for small brown specks forming and a toasted, nutty aroma. The butter will change from yellow to amber — this is brown butter.
Once you see golden-brown flecks and smell toasted hazelnuts, remove the pan from heat immediately to avoid burning. Pour the brown butter into a heatproof bowl to stop cooking. Let it cool for 4–6 minutes.
Tip: If you like a slightly nutty crunch, reserve a teaspoon of the browned milk solids and sprinkle on top of the blondies before baking.
2. Mix wet ingredients
To the warm (not hot) brown butter, whisk in the packed light brown sugar until mostly dissolved. The heat will help melt the sugar and create a glossy batter.
Add eggs, one at a time, whisking thoroughly after each addition.
Stir in the vanilla and the packed white miso until smooth. The miso dissolves into the wet mixture and imparts its savory lift.
Why brown butter before adding sugar? Browning the butter first amplifies flavor. The residual warmth helps dissolve the sugar without overcooking the eggs.
3. Combine dry ingredients
In a separate bowl, whisk together mochiko, all-purpose flour, baking powder, and salt.
Add the dry ingredients into the wet mixture in two additions, folding gently with a spatula until just combined. Avoid overmixing — you want the batter homogenized but not tough.
4. Fold in mix-ins
Fold in chocolate chips and toasted nuts if using. The batter should be thick, glossy, and slightly elastic.
5. Bake
Line a 9×13-inch pan with parchment, leaving an overhang for easy removal. Preheat oven to 350°F (175°C).
Spread batter evenly into the prepared pan, smoothing the top with an offset spatula. If you reserved browned butter bits, sprinkle them now. Top with a few extra chocolate chips and a light dusting of flaky sea salt.
Bake for 20–28 minutes. Start checking at 18 minutes if your oven runs hot. The blondies are done when the edges are set and a toothpick inserted in the center comes out with moist crumbs (not raw batter). Avoid overbaking; you want chew.
Remove from oven and cool on a wire rack for at least 30 minutes. For cleaner slices, chill in the refrigerator for 30–60 minutes before cutting.
Timing note: Baking times vary by pan size and oven. An 8×8-inch pan will need longer (about 28–35 minutes) and yield thicker blondies.
Recipe card (printable)
Brown Butter Miso Mochi Blondies
Yield: 24 bars (9×13-inch) | Prep: 20 minutes | Cook: 20–28 minutes
Ingredients
12 tbsp (170 g) unsalted butter
1 1/2 cups (300 g) packed light brown sugar
2 large eggs
1 tsp vanilla extract
2 tbsp white miso (packed)
1 cup (140 g) mochiko (sweet rice flour)
1/2 cup (65 g) all-purpose flour
1/2 tsp baking powder
1/2 tsp fine sea salt
1/2 cup (90–120 g) chocolate chips/chunks
1/2 cup toasted pecans or walnuts, chopped (optional)
Flaky sea salt for finishing (optional)
Directions
Preheat oven to 350°F (175°C). Line a 9×13-inch pan with parchment.
In a light saucepan, melt butter over medium heat. Swirl until milk solids brown and butter smells nutty. Transfer to a bowl; cool 4–6 minutes.
Whisk brown butter with brown sugar until combined. Add eggs one at a time, whisking well. Stir in vanilla and miso.
Whisk mochiko, all-purpose flour, baking powder, and salt in a separate bowl. Fold dry ingredients into wet until just combined.
Fold in chocolate and nuts. Spread batter into pan; top with extra chips and flaky salt.
Bake 20–28 minutes until edges are set and center yields moist crumbs. Cool completely; chill for neat slices.
Technique deep dive: Browning butter like a pro
Browning butter is often a show-stealer in recipes because it adds an almost savory depth to sweet desserts. But it’s also where novice bakers can accidentally burn butter.
Use a light-colored pan. This helps you see the milk solids as they brown.
Swirl, don’t stir aggressively. Gentle swirling and occasional stirring keeps the solids from sticking.
Listen and smell. Butter will foam, then subside. The sound becomes quiet and the aroma shifts from milky to toasted.
Don’t walk away. Milk solids can go from golden to burnt in seconds.
Cool the brown butter slightly before adding eggs to prevent partially cooking them.
If you overcook the butter to a dark brown or burnt smell, start again. Slightly darker bits give nuttier notes, but burnt tastes will ruin the dessert.
The science of mochiko in baking
Mochiko is made from glutinous rice — “glutinous” refers to the sticky quality of the starches, not to gluten. When heated with liquid and sugar, the starches in mochiko gelatinize and create that chewy structure. In a blondie:
Mochiko provides elasticity. It binds more water than wheat flour, which keeps the crumb moist and chewy.
It affects crumb openness. Mochiko will usually produce a denser, more cohesive crumb than all-purpose flour alone.
Pairing with wheat flour retains familiar structure while adding chew. Using too much mochiko can make the blondies gummy, whereas too little won’t produce the mochi effect.
Balancing mochiko with a proportion of all-purpose flour gives the best of both worlds: chew plus structure. For gluten-free bakers, combining mochiko with tapioca starch and xanthan gum can emulate the structure of gluten.
Flavor balance: using miso
Miso is a fermented soybean paste that ranges from salty and robust to subtle and sweet. White miso is mild, slightly sweet, and perfect for desserts. It adds depth without overtly tasting like soy.
Taste it first. Different brands have different salt levels. Adjust added salt accordingly.
Miso dissolves in fats and liquids. Mixing it into warm brown butter helps it disperse evenly.
Don’t overdo it. Two tablespoons create a gentle umami lift without making the blondies savory.
For adventurous bakers, try red miso in a small test batch — it’s stronger and earthier and will produce a more pronounced savory note.
Texture and baking tips
Do not overbake. The ideal blondie has set edges and a slightly soft center. Overbaking dries them out and reduces chew.
Chill before slicing. Cooling and chilling the pan makes cleaner slices. Warm blondies are gooey and may crumble.
Use an offset spatula to spread the thick batter evenly.
Rotate the pan halfway through if your oven has hotspots.
Troubleshooting common problems
Blondies are gummy or underbaked in the center.
Oven temperature may be inaccurate — verify with an oven thermometer.
Pan size too small (batter too thick) increases bake time; use correct pan.
If too gummy after full bake, tent with foil and bake 5–8 more minutes.
Blondies dry out.
Overbaked. Reduce time by 2–5 minutes next bake.
Too much flour. Spoon-and-level your flour when measuring.
Edges burn before center cooks.
Your oven runs hot at the edges; lower oven by 10–15°F and increase time slightly.
Use an insulated or darker pan? Lighter pans reflect heat and bake more evenly.
Don’t taste miso flavor prominently.
The miso is meant to be subtle. If you want a stronger miso presence, add 1/2–1 tablespoon more, but taste the batter as you go.
Variations & flavor ideas
Matcha Miso Mochi Blondies: Fold 2–3 tablespoons matcha powder into the dry ingredients. Top with white chocolate chips for a Japanese-inspired twist.
Black Sesame: Fold 1/4 cup toasted black sesame seeds and swirl tahini on top before baking.
Yuzu Miso Blondies: Zest a yuzu or lime into the batter for citrus brightness; pair with white chocolate chips.
Brown Butter Miso Blondies with Salted Caramel: Swirl salted caramel through the batter before baking, but watch that the caramel doesn’t create soggy pockets — use a thick caramel.
Chocolate-studded: Increase dark chocolate chunks to 3/4 cup for a more chocolate-forward bite.
Fruit-forward: Fold in dried cherries or chopped medjool dates for chewy fruit pockets.
Vegan adaptation
You can make a vegan version by substituting a few ingredients:
Butter: Use a vegan butter with a high fat content and brown it carefully. Not all vegan butter browns like dairy butter — start with a brand known to brown well.
Eggs: Use 2 tablespoons ground flaxseed + 6 tablespoons water (let sit 10 minutes) for each egg, or use a commercial egg replacer designed for baking.
White miso: Still fine for vegan use (it’s soy-based but check for additives).
Texture will vary; mochiko helps a lot in producing chew and structure.
Storage and freezing
Room temperature: Store in an airtight container for up to 3 days.
Refrigerator: Keep for up to 7 days; bring to room temperature before serving for best texture.
Freezing: Wrap individual bars in plastic and freeze for up to 3 months. Thaw overnight in the refrigerator, then bring to room temperature.
For warm, gooey blondies, reheat single pieces in a 300°F (150°C) oven for 5–8 minutes or microwave for 10–15 seconds.
Serving suggestions & pairings
Tea: Genmaicha or hojicha complements brown butter and miso with roasted, toasty notes.
Coffee: A medium roast with nutty flavor plays beautifully with the blondie’s brown-butter profile.
Ice cream: Serve warm with a scoop of vanilla or tahini ice cream for contrast.
Whipped cream or crème fraîche: A dollop tempers sweetness and adds creaminess.
Wine: A late-harvest Riesling or a lighter tawny port can be a delightful pairing for dessert service.
Photography & presentation tips
Cut clean slices: Chill fully, then warm briefly in the oven for a few minutes before serving to restore that just-baked feel.
Use a serrated knife moistened with warm water between cuts for cleaner edges.
Top with flaky sea salt just before photographing — it catches light and signals contrast.
Show the interior: Break a blondie in half or cut into squares and re-stack to show chew and chocolate pockets.
Frequently asked questions (FAQ)
Q: Can I use regular rice flour?
A: Regular (non-glutinous) rice flour will not provide the same chew. Mochiko (glutinous rice flour) is recommended.
Q: What does miso do in sweet recipes?
A: Miso adds depth and umami. In sweets it heightens perception of sweetness and adds complexity without tasting overtly like soy.
Q: Will these be cakey or dense?
A: They’ll be denser than a cake but tender and chewy. Adjust the mochiko/AP flour ratio for more tender (less mochiko) or chewier (more mochiko).
Q: Can I make these nut-free?
A: Yes — omit nuts or replace with seeds (pumpkin or sunflower). Toast seeds for extra flavor.
Scaling the recipe
Half batch: Use an 8×8-inch pan, reduce bake time slightly, and watch from 20 minutes onward.
Doubling: Use two 9×13-inch pans or a larger commercial sheet. Bake time is similar but check uniformity — larger trays may need extra minutes.
Final thoughts
Brown Butter Miso Mochi Blondies sit at a fun intersection of cultures and techniques. They’re approachable enough for a weekend bake yet special enough for gifting or a dinner party. The toasted notes from browned butter combined with subtle savory depth from miso and the addictive chew from mochiko create a memorable dessert. Once you’ve mastered the basic formula, play with mix-ins and toppings — matcha, sesame, citrus, or caramel — and make the recipe your own.